Building in Minecraft: A Simple Guide
How to build in Minecraft through an artistic lense

Hi! In this blog post I will walk you through my process of building in Minecraft. In recent months I have been enjoying playing again and have started to practice my skills quite a bit and I wanted to share what I have learned so far, as to inspire and hopefully guide. I wouldn't consider this a how to explanation, since it is more of a thought process. This blog post explores one approach within creative mode, I have also uploaded a video where I walk through working on a building in survival. This guide is not fully edited, so if you have suggestions or edits, please write an email to me!
Philosophy and Inspirations
Of course, I have to start with the philosophy of this approach and just in general how I see building in Minecraft. Now let me be super clear upfront! Most of the things I am talking about here are from acquired knowledge from mainly BdoubleO100 and the Hermits. Building with Bdubs, - a series where BdoubleO100 plays singleplayer - showed me a lot of new concepts that I will share shortly, but importantly his series revealed to me that Minecraft can be treated like painting, kinda. So, for me when I build I am thinking in terms of what does the picture look like. I am not concerned with whether the material choice makes sense or whether the building I am working on is exactly to player scale. It is more about just enjoying my time working on something I might look back on and say: "Yeah! At the time that was really something great that I worked on!" With that, please take the things you want from this little guide and get rid of the rest. It is very much a personal choice of playstyle. Now, on to the first lesson.
Lesson 1: Steal!!!
Yes, go out and steal ideas, tricks and concepts and use them for your own good. I have stolen so many little contraptions or block palettes or building tips from many sources. When I will talk about what I have specifically built and how I got there, I will try to mention from where. Of course, don't take this to an extreme.
Anyways, let's get to the method I used for building the facade above.
Step 1: Inspiration and Reference
Now, this step is technically skippable, but I believe this is a very important one for development of skills.
Finding inspiration is often difficult, but sometimes a breeze. I could write on inspiration for a while, in fact I talk about it here and possible elsewhere on my blog, but I will forgo the discussion and jump straight to some practicalities.
For me, most often inspiration for Minecraft builds comes from real life. I often see a building or corner in nature or anything else really, that makes me instantly think: "Ah yes, that is quite lovely, I should try capturing this moment." Then I would take a photo with my camera and quickly follow up with a different thought: "I should try to build this in Minecraft." This was the case for me for the build I am about to describe and I used the picture I took as a reference.
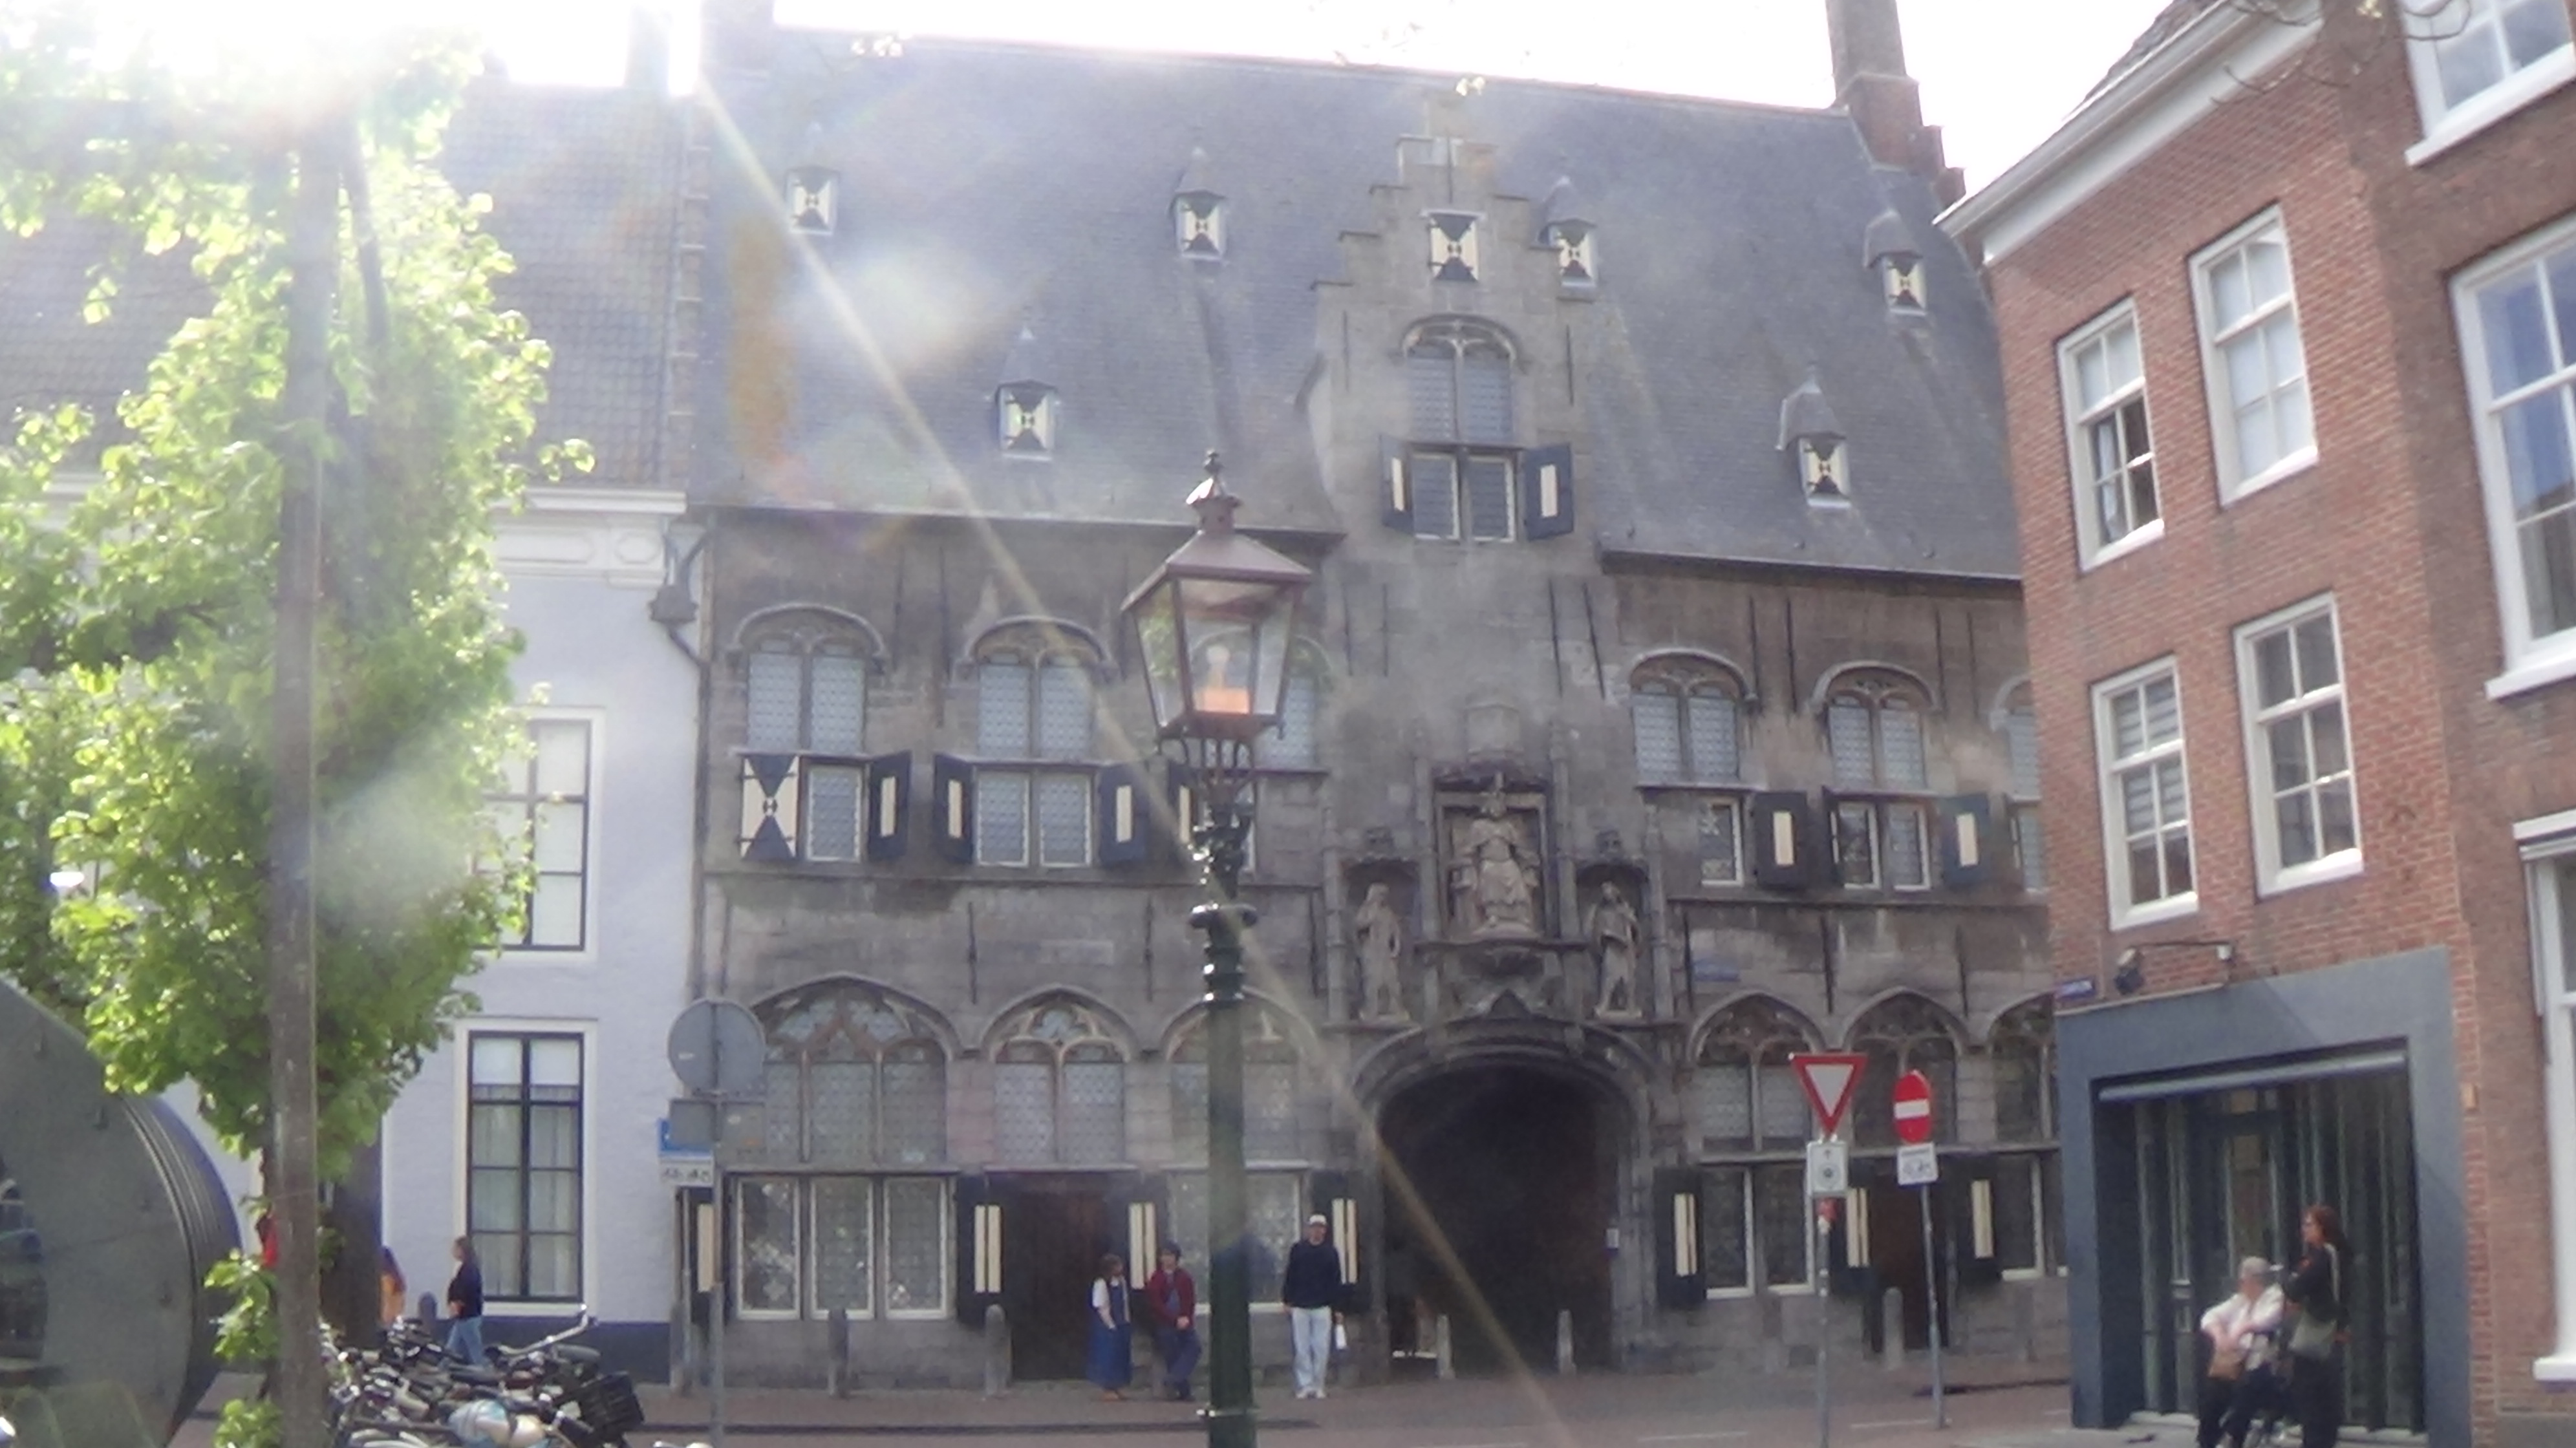
Another approach that I have used before, is having inspiration for something specific, like a rundown train station in a deep forest. In this case it is useful to go looking for a reference online. Pinterest usually works. Now an important note here is that we are not looking for Minecraft examples of the imagined scene/build, we are looking for real life images or maybe art. Why? Well that comes down to the idea of references.
A reference in art is an important educational tool. When you first start drawing or painting you usually want a reference, an anchor, a goal that keeps you on track. With a reference you can look at it and examine exactly what makes it look the way it does. This helps a lot when learning. It is tempting to just try to put down whatever you imagine on the page, but with no prior context or experience it often leads to disappointment. It might seem easier to find an image of somebody else's build and take that and try to make it your own, and it would definitely be faster to do, since you see what you are aiming for, but time is not your enemy.
Of course, looking at other build to see what kind of crazy uses some blocks have is interesting and worth it maybe even.
Building from reference allows you to develop your own style.
Lesson 2: Take your time
Let me put this into practical numbers. The build I am describing here took me about 5-6 hours. Remember this is only a facade for a building and I have some experience already (still learning though). That is a really long time, at least for hobbyists like me. Currently I am in a situation where I can afford to spend some time on this hobby of mine, but it is likely that you might not. This makes me want to discuss scope of a project, but I will keep that for another time. If you only have 1 hour every once in a while to work on some build of yours don't rush it. Take your time. The result is going to be much more satisfying if you let yourself enjoy this long process.
This lesson I heard at first from Bdubs. He related it to patience in one or two episodes of his building with Bdubs series. Making good art/builds takes patience. (good here is in reference to your own standard)
Step 2: Getting the shape right
Now that you have acquired a reference image it is finally time to jump in the game and start placing some blocks. My suggestion, use wool. As suggested by many builders wiser than me, establishing a shape is important, especially if you are building something for survival. But in this case I am making a facade, so I am treating this more like a sketching phase, where I am trying to get the scale and shapes about right.

Now you can see that I am outlining the building, approximating the roof shape, planning out where some details would go.
From my reference image I knew that I wanted to attempt to do small scale statues on top of the tunnel. Fortunately I had recently watched a great video by wifies where many builds by Horace Creations were showed, and there I saw a statue they did with a debug stick I believe to manipulate walls. And I also had learned a while back from Bdubs that you can easily mask manipulations of walls with stained glass panes. This results in me using Lesson 1 and stealing the statue idea and wall manipulation technique to give a vanilla statue that looks neat.
I want to also note that sometimes you have to interpolate from the reference image. In my case I didn't exactly know what the roof shape was, but I could tell it was steep, so I kinda just made a creative decision to make it cure slightly near the edge.
Another aside here, I encourage you chase what feels important for this stage and move on to the next steps as soon as you think it is time. For example, I already started thinking of how I would do the windows, specifically how to do a pattern similar to the reference image. I quickly landed on copper grates, which in my opinion work great as a latticed window frame.
With a shape outlined and some markings for points of interest noted, we can move onto
Step 3: Experimentation Starts
This is where the fun, or torture begins.

In this stage, it is time to start just trying things out. I started with the windows. I wanted to keep an intricate masonry look, so I was really considering using hoppers as arches, but the idea didn't go far since the color palette would turn too dark, as can be seen in the image. But this took a solid hour to sit through just looking for shapes that I liked. I ended up not finding anything that I was terribly satisfied, so I just moved on, which illustrates Lesson 3.
Lesson 3: Don't be afraid to move on
When building you are bound to hit a wall at some point. Something that just doesn't look right, maybe a missing type of block or color. A problem that just seems impossible to solve. In these moments it is tempting to give up, but that wouldn't be fun now would it. Instead try shifting your focus. Move to a different part of the building process, maybe the next step I outline here. Often enough this frustration comes from a specific little area, that could just be lacking context to look the way you imagine it, and stepping away for a moment and letting the building sit will likely drum up some new ideas in you on how to approach the problem.
This idea of taking a step back and letting a building sit, you just observing and evaluating, also comes from Bdubs, surprise surprise.
Step 4: Color Palette and Shading
Some people might do this earlier, but for this particular build, only after experimenting did I realize that I was struggling because I wasn't sure what colors I will be using, well more precisely what blocks I would use because the color was quite obviously grayish.

I quickly decided on a simple 3 block gradient of dark to light gray using concrete, wool and concrete powder. With this palette in mind I quickly covered a part of the building in it. I also did some preliminary shading.

Shading is the usage of brightness to convey shadows. This is very effective in creating depth without going many blocks off the wall. I try to stick to around one block depth into and out of the wall. This is just preference though. Back to shading, I like to use a gradient going from dark to light, where I think shadows might have been cast. You can see approximately what I am thinking in the image. Some shadows under windows, the roof and even some shading in the roof near the dormer.
Another thing to consider is weathering of buildings. Most buildings have some weathering effects from rain, damage or just old paint coming off. This gives character to each building but it also breaks up the monotony of a single texture. So, I usually consider adding just "blobs" of other colors in my builds. For example, the reference image contains a browner grey in the upper right side, which seems to be some sort of weathering, so I tried to apply that to my build as well.
In terms of technique an inspiration would be Snarple, his approach to color theory in Minecraft yields beautiful color transitions. I slightly tried using a simple idea from his approach with a source of light. On the left I used more white to fade into the gray as to represent a light bleeding onto the building from the left.
But the last thing to add is details.
Step 5: Details
We are almost there. With a superb canvas that has been created so far, we can dive into the details.

This phase is usually the most fun for me, because you really start to see the build come together. Here you can try sectioning your building like I did with signs or shelves or anything you come up with. It was also time for me to finalize a window design, statue surroundings and importantly the little metal strips on the building. I really wanted to get that look. I ended up finding chains with a bit of iron bars to be a decent solution. Of course physically the chains are floating, but I am suspending my disbelief a little here, so I can build a picture I like.
Go ham here!
Conclusions
Go out and build. I think I have outlined semi decently how I came up with this building facade and hopefully along the way gave some wisdom that you may take and build your own beautiful things.